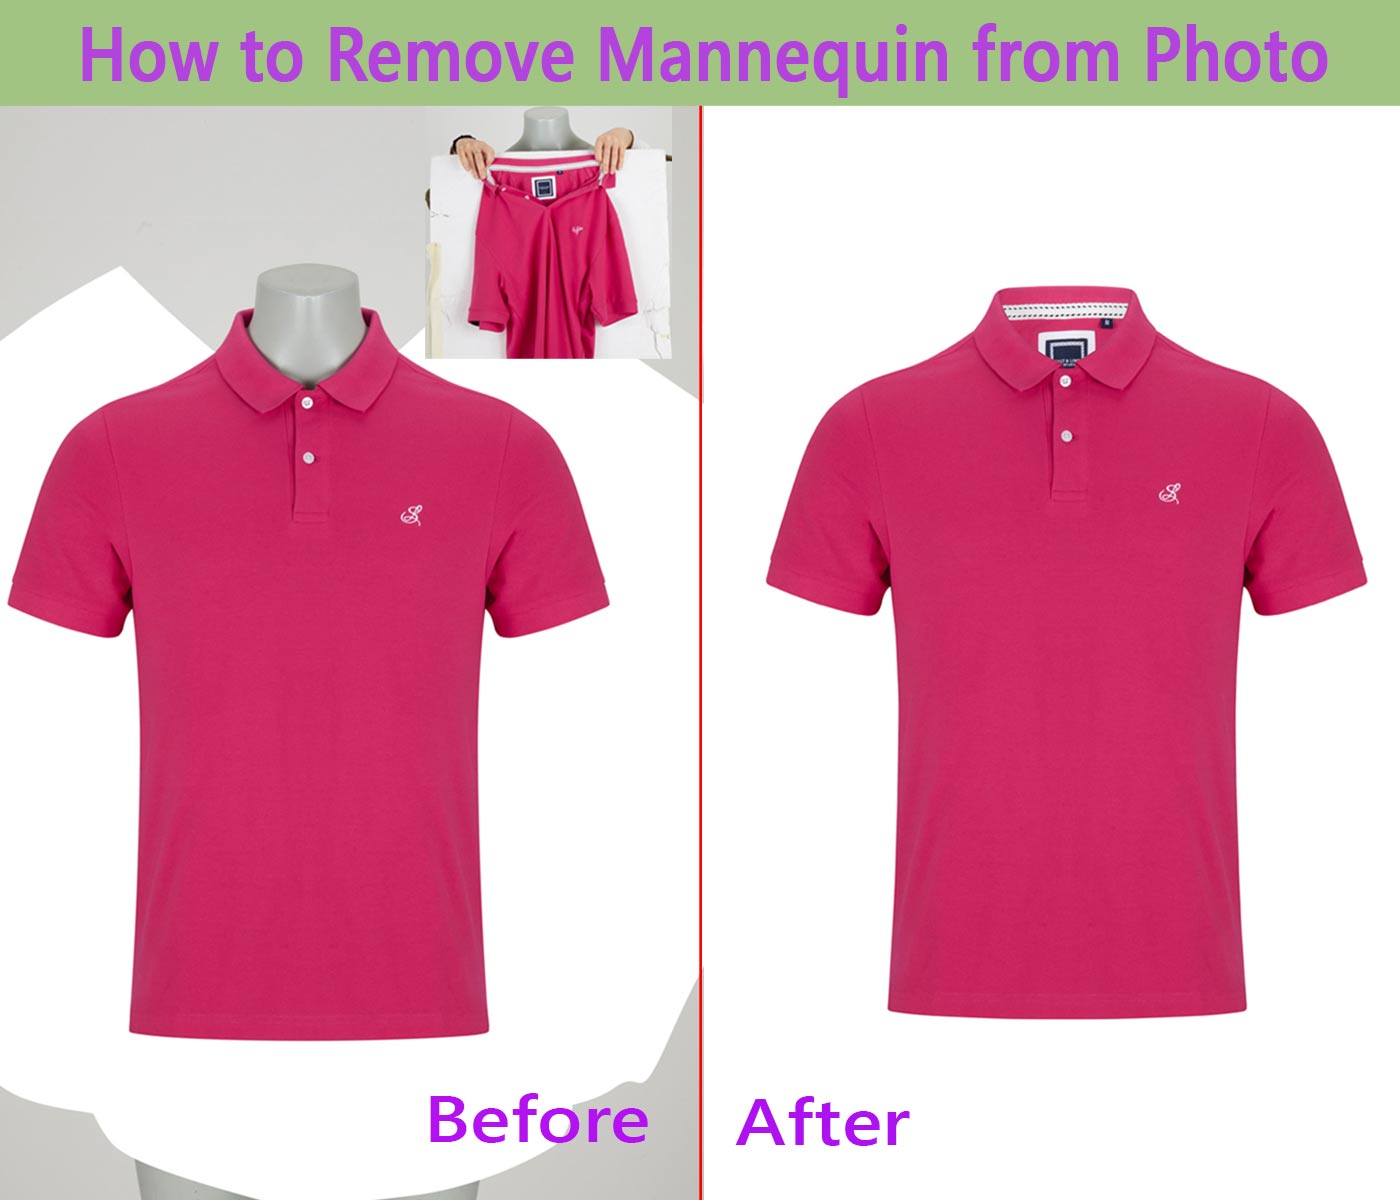
How to Remove Mannequin from Photo
Learn how to remove mannequin from photo so your clothing photos to get an outstanding view that will help you get more orders. But the burning question is how to remove mannequins from photos. This blog is only for you who are facing problems with removing mannequins from apparel photos.
In apparel photo editing services, removing mannequins is a common and widely used service. A photo needs to be optimized before it is listed on big online buy-sales platforms like Amazon, Ebay, Estay, etc. But optimizing a photo for Amazon or another online platform is not rocket science. Here, you need to learn to use some Photoshop tools like the pen tool, healing brush tool, eraser tool, etc. Then, you can optimize images as you want.
Before starting the main discussion, why you should remove the mannequins from the photo and what is the necessity of it.
Why Remove Mannequins?
From the above discussion, we have learned about some of the online marketing platforms for the e-commerce clothing business. So, e-commerce photo editing has a very significant role in surviving the business owner in the competition. As much as you can perfect yourself in this competition by applying various unique techniques, you will be a dominator in that industry. Removing the mannequin service is very important for clothing business owners. By removing mannequin and adding Neck part of the photo you can make the invisible mannequin effect. This effect helps to make sense to customers regarding the apparel products. Because this effect is such an effect, it helps to get a real visual view from smart devices.
In this case, the main factor is the right tool selection and setting. So, let’s see what tools are important for this task.
Selecting Right Tools and Settings for Remove Mannequin from Photo
Choosing the right tools is the vital thing for removing mannequin from clothing photos. We will use a pen tool for background removal of images, a clone stamp tool, and a healing brush tool for retouching the product photo. The uses of these tools are mandatory here.
Now it is time to see the step-by-step process of how to remove mannequin form the photo. Let’s start and enjoy it.
Best Method to Remove Mannequin from Photo
You should read this blog very carefully. Every step of this process is very important to remove a mannequin from a photo. As we discussed in the pen tool, we will remove background of the image using the pen tool by doing a clipping path.
Step 01 : Open the photo and create a new layer
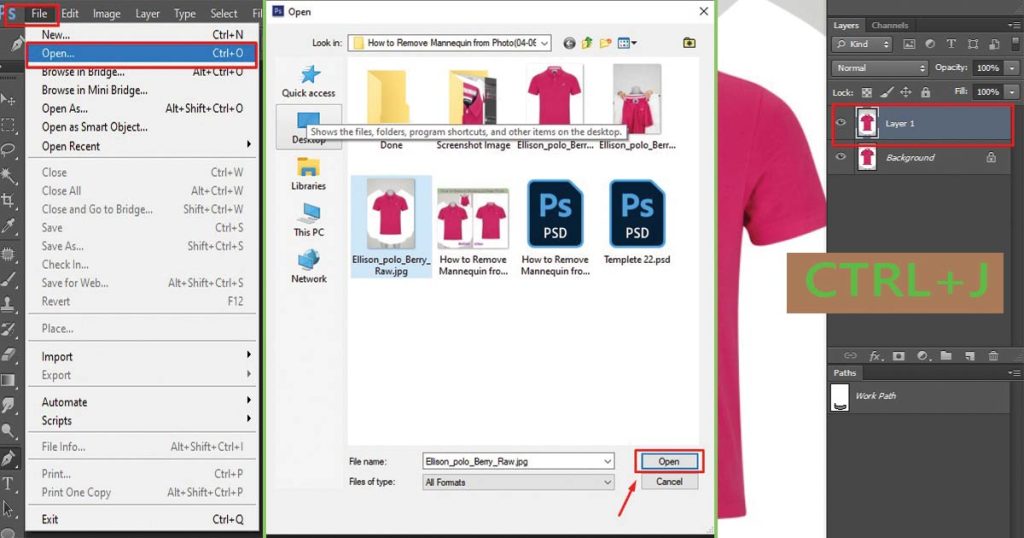
Open the photo in Photoshop. Please go to the file option from the left side of the Photoshop interface, select the photo, and open it. Then, create a new layer by pressing CTRL+J for window and COMMAND+J for Mack.
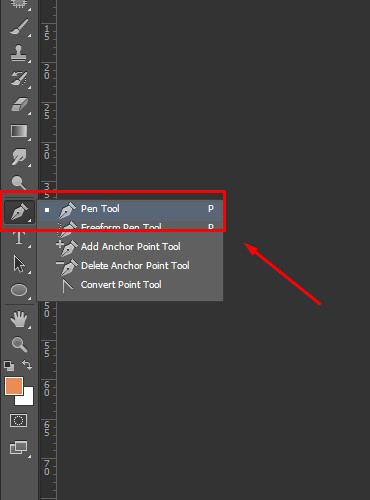
Step 02 : Select pen tool
Pen tool is the best tool for removing background images. You can find it from the toolbar located on the left side of the photoshop interface. You can select the pen tool by pressing “p”.
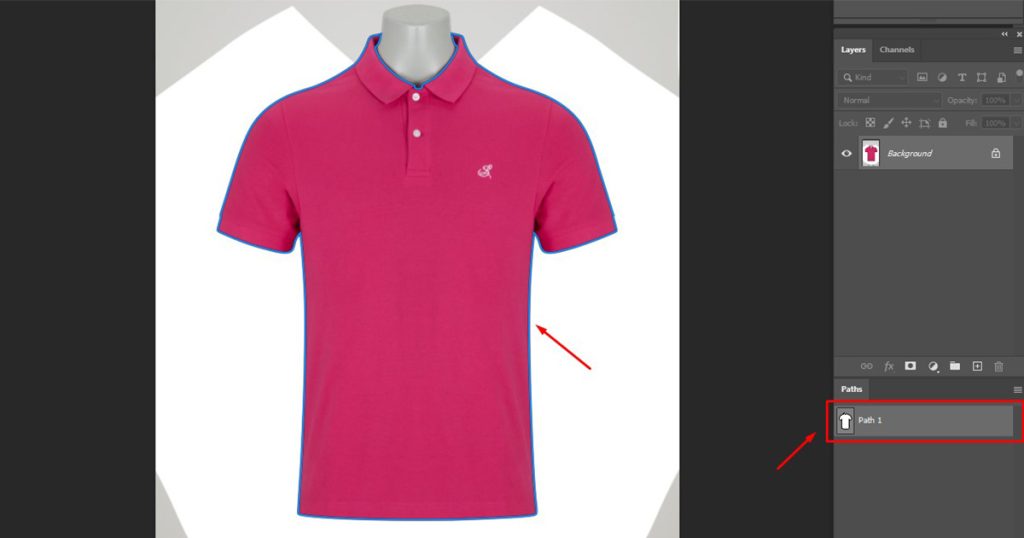
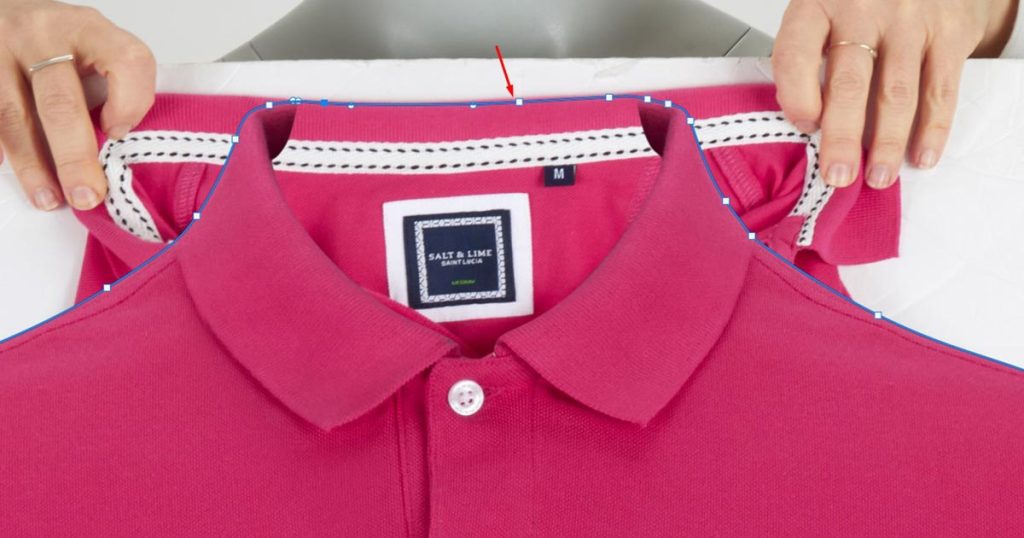
Step 03 : Create outline
After selecting the pen tool then create an outline behind the focus image by doing a clipping path.
Pro tips: “Here you should be careful at the time of creating a clipping path. Putting anchor points is the main factor. Hard anchor points can change the image shape.”
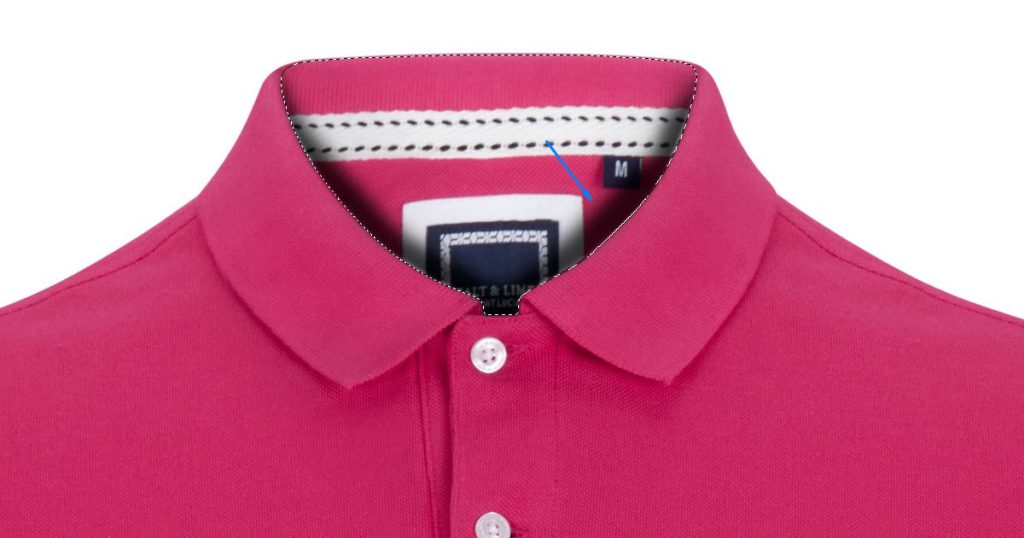
Step 04 : Select the Path
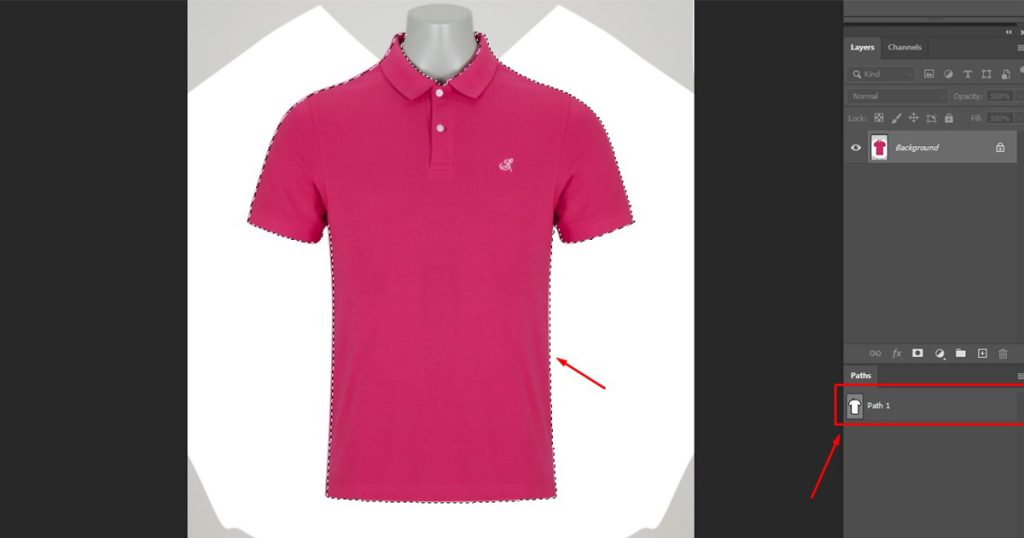
After completing the outline, select the path from the path layer by clicking on it.
Step 05 : Select Feather
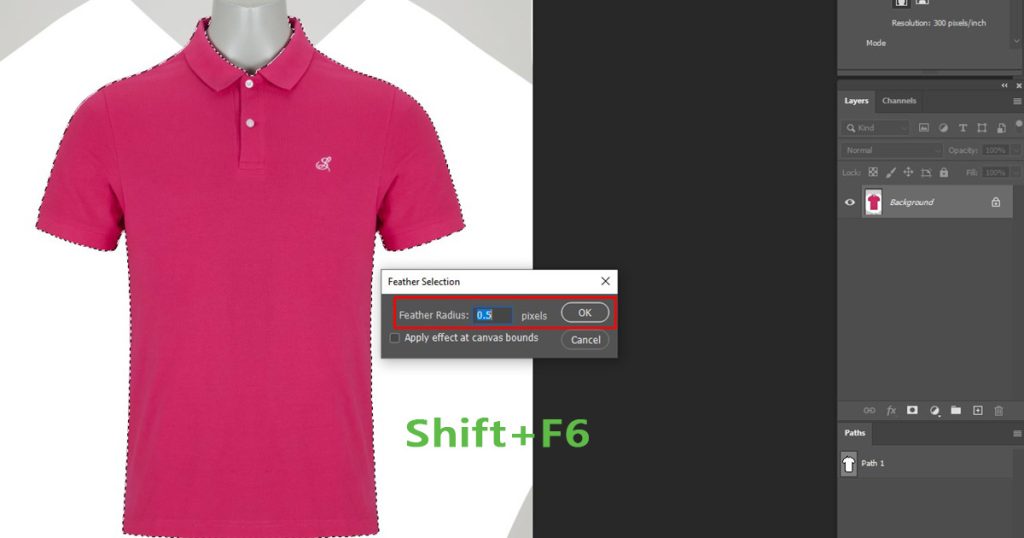
Select the path and put the feather at 0.5. It depends on the image’s edge hardness. If you want to keep a soft edge, you should increase the feather.
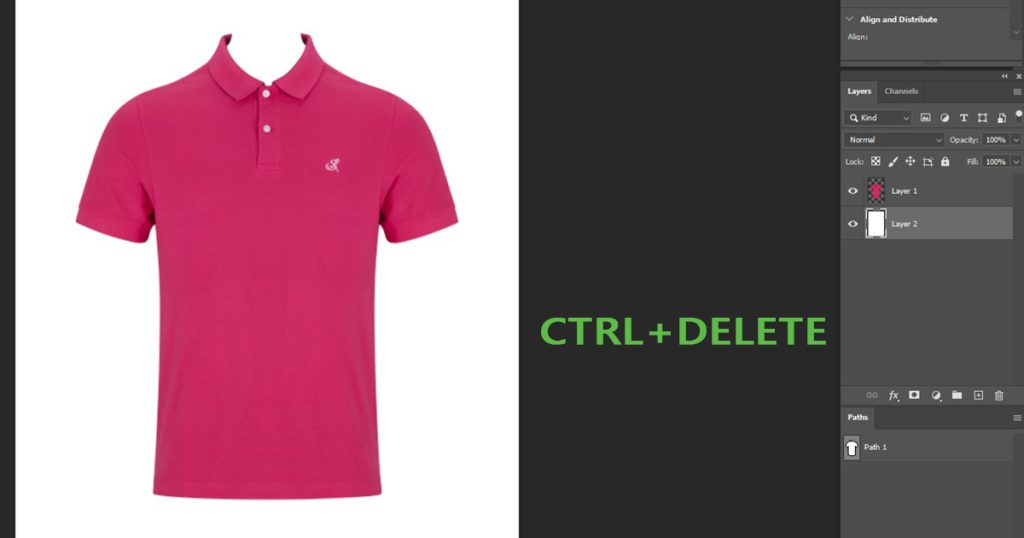
Step 06 : Delete the Background
For deleting the background, keep off the background layer. Then press the Delete button. You will get the focus image without a mannequin.
These 6 steps are enough to remove the mannequin from the photo. But after deleting the mannequin, the image neck can be empty, which may be very odd-looking. In this case, the ghost mannequin service is much more effective for giving a 3D ghost mannequin view. In this circumstance, you should know how to make an invisible mannequin in Photoshop. It is not a very tough job. Let’s see how to do it.
Step 07 : Copy Neck part and paste to the main image
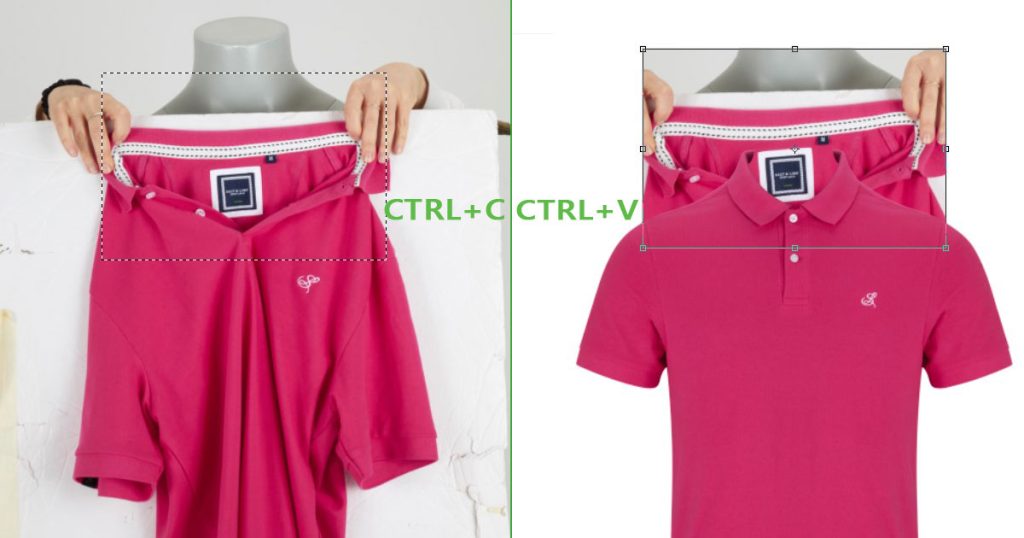
Open the neck part of the image on photoshop as before. Then copy the neck part and paste in the main image.
Step 08 : Adjust the Neck
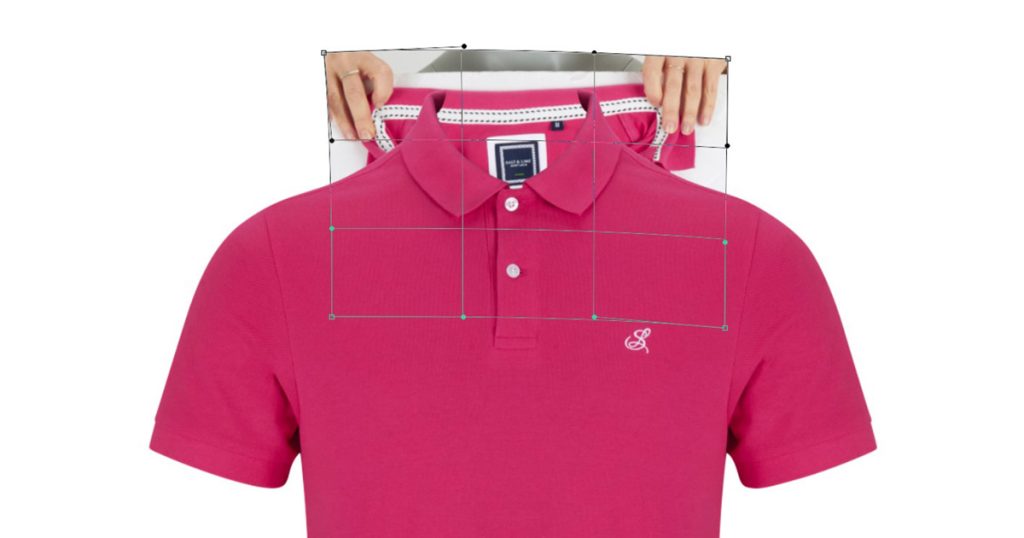
Selecting the neck layer from the layer panel, Press CTRL+T for window and COMD+T for Mac. Then, the neck part will be selected and adjusted as per image requirements.
Step 09 : Draw clipping path
After adding the neck, some areas of the image may be unnecessary. For this reason, draw the clipping path again outside of the whole image and delete the unnecessary areas.
Setp 10 : Add drop shadow
After the whole process, there needs to be a finishing touch. Adding drop shadows is the final task to do the ghost mannequin effect. For this create a new layer between the neck part and the main clothing image. Add drop shadow in the new layer. You will get the 3D Ghost mannequin effect.
Best Practices and Tips & Tricks
There are many ways to remove a mannequin from the apparel image. You can use a lasso, eraser, or magic tools to remove it. But if you want to get a professional result. You should apply the pen tool for it. Otherwise, the result will not be experienced because using these 3 tools can damage the image. You can also use an AI tool, but the result will be the same. For professional output the whole process of this article is mandatory.
Alternative Solutions to Remove Mannequin from Photo
Ghost mannequin service is a must-have service for fashion photographers, those involved in the e-commerce business, or those who sell clothes online. Through this service, they present their pictures in an attractive way to their clients. But they have to face various ironies while taking up the ghost mannequin service. So, Alternative Solutions to Remove Mannequins from photos are briefly discussed here.
Option 1 : Use an Online Photo Editor
There are lots of free online photo editing tools that allow you to remove objects like mannequins from your images with just a few clicks. Websites like Pixlr and Photoscopia have handy object removal features. So, just upload your photo, outline the mannequin, and let the tool automatically remove it and fill in the background.
Option 2 : Photo Editing Software
If you have access to photo editing programs like Photoshop or GIMP, you can use more advanced editing tools to precisely remove the mannequin. Also, in Photoshop,The content-aware fill and spot healing brush tool features can seamlessly blend the area where the mannequin was to match the surrounding background.
Option 3 : Remove It Manually
For a low-tech solution, you can also try manually editing the image by copying and pasting parts of the background over the mannequin using a basic photo editor or software like Microsoft Paint. This works best for simple, plain backgrounds.
Option 4 : Ask an Image Editing Expert Like EditPictureOnline
If you aren’t skilled at photo editing yourself and need a professional look for your photo, or you will use it for your business. So, you must hire a professional image editing service to remove the mannequin from a photo flawlessly. EditPictureOnline is here to solve all your problems related to ghost mannequin. Also, we are doing all types of apparel photo editing related post production like ghost mannequin, wrinkle removal from cloth photo , Symmetrical for cloth or any types of photo and many more.
So don’t let an unwanted mannequin ruin your cherished photos any longer. By these few simple tips and tools, you can easily remove it and end up with a mannequin free image.
Final Touches and Review of Remove Mannequin from Photo
Before posting the photo on the online store, you should provide the final touches and reviews. If the image differs on both sides, you should apply Photoshop symmetrical techniques. In the same way, there may be wrinkles on the clothing photo. In this case, you should use the wrinkle remove technique. Moreover, you should optimize the image size for various online marketing platforms. Then you will get more sales.