How to do Symmetrical Balance of Clothing Photo in Photoshop
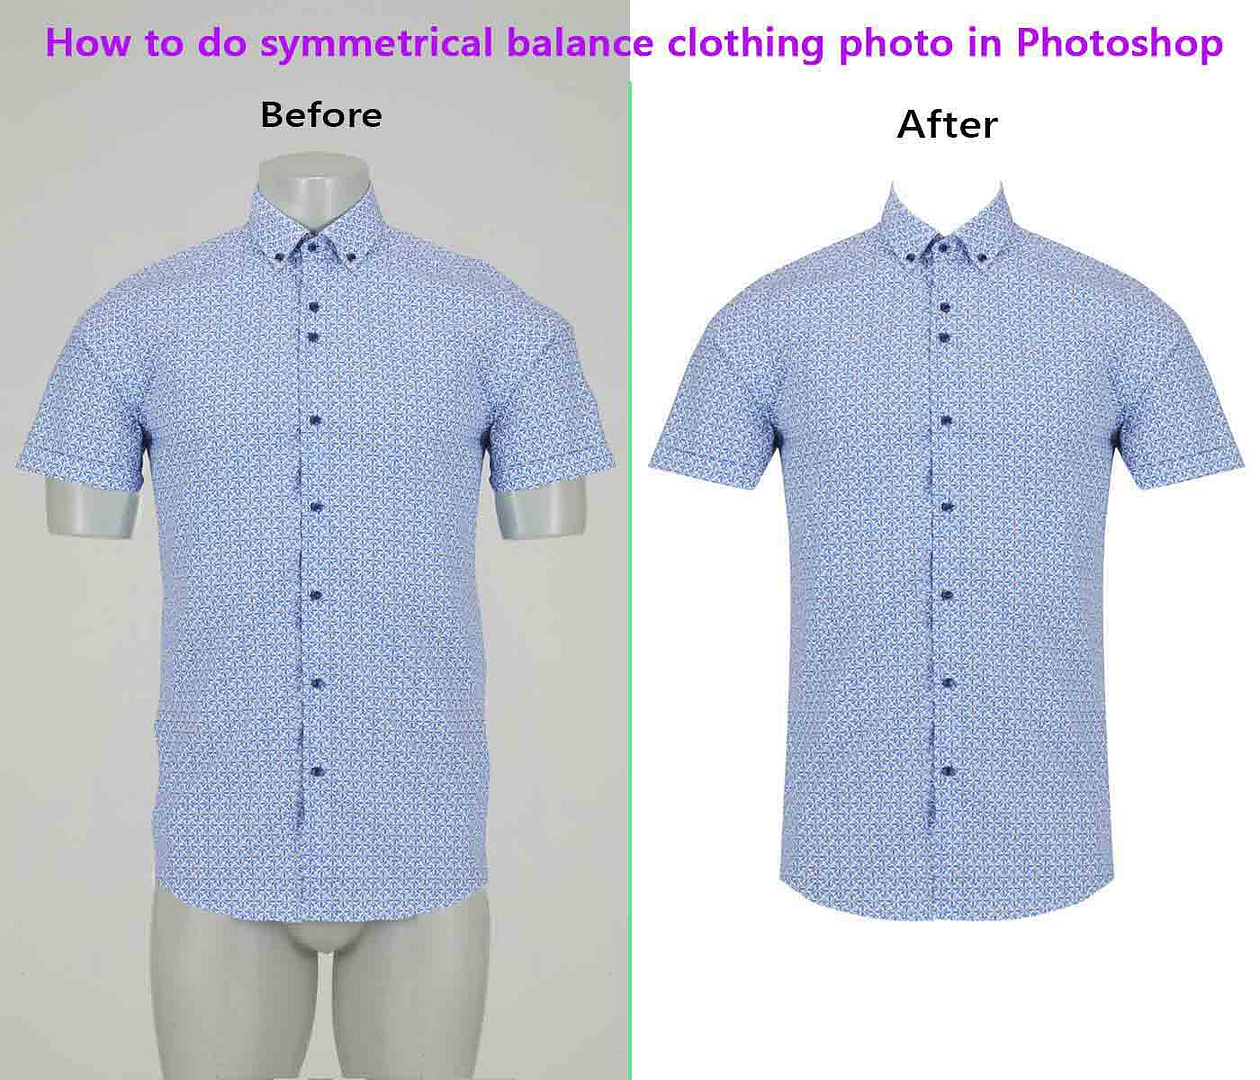
Unlock the symmetrical balance potentiality inPhotoshop and keep yourself in upper level than the competitors. This blog only for them who want to keep themselves on the apex in clothing photo shooting & clothing product buy-sell industry. The easiest step by step guideline will help you to know How to do symmetrical clothing photo in Photoshop.
Symmetrical Clothing photo in Photoshop means doing left side and right side equal in shape and size of clothing image. In the apparel photo editing industry, it is one of the very familiar services. It provides a great visual balance of both side of apparel image. This blog is going to be very enjoyable, but we should know what the Symmetrical clothing in Photoshop in detail. So, let’s learn it in detail from the bellow discussion.
Table of Contents
ToggleStep by step guideline symmetrical balance of clothing in Photoshop
There are two familiar ways to do symmetrical balance of clothing photography. One is mirroring effect and other is drawing stork outside of image. Mirror effect is the easier and effective way for slid color apparel image but if there are texture, stripe, or paint in the image, the mirror effect does not work. In this case drawing stock is the best solution. Let’s see these two ways in step-by-step guideline and process in the bellow.
01. By Doing Mirror Effect
If you stand in front of the mirror, you will see your picture in the mirror. In the same way, if you cut the beautiful part of the apparel image and add it to the other part, both side of the apparel image will be same. This process needs to involve photoshop technics. So, let’s see how to do mirror effect in photoshop of apparel image by step-by-step process.
Step 1: Open the image in photoshop
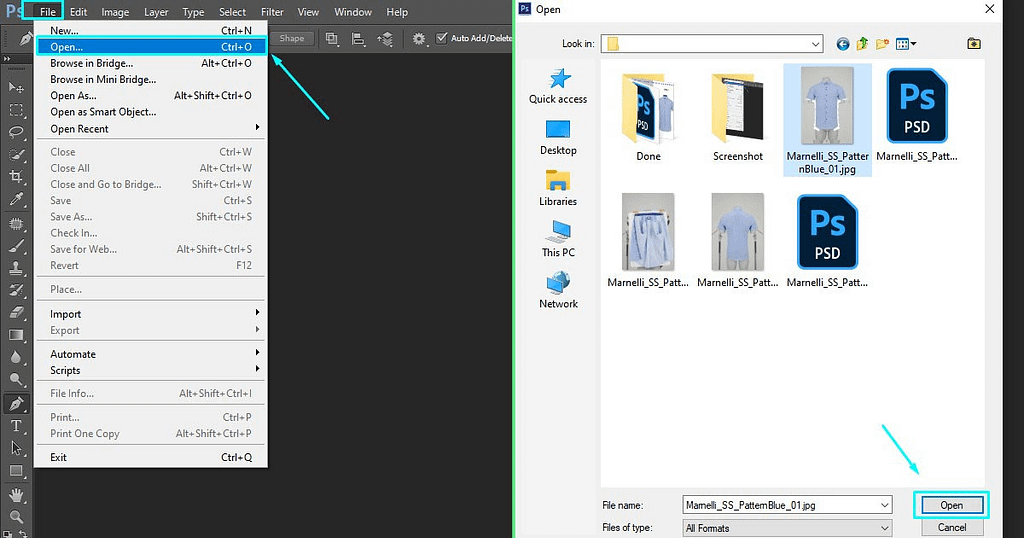
Open the apparel image in photoshop and create a new layer by pressing CTRL+T in window and COMN+T in Mac.
Step 2: Draw Clipping Path
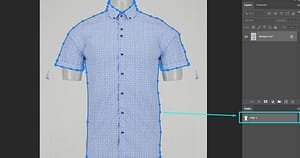
Using the Pen tool, draw clipping path outside of the whole image. You can use magic wand tool, Quick selection tool, Object selection tool, and lasso tool for instead of the pen tool but pen tool provide more professional result than all other tools.
Step 3: Remove the image background
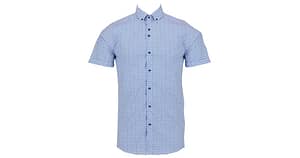
After completing the clipping path, select the path by pressing left button of mouse on the path layer. The select feather by pressing SHIFT+F6. Then inverse the selection and remove the background by pressing delete button.
Pro tips: Selection of feather of vital thing for removing background because due to increasing or decreasing of feather radius the image edge can be softer or harder.
Step 4: Select the beautiful part of the image
Select the beautiful part of the image by using the rectangular marquee tool. Then press CTRL/COMD+J as per your computer to copy the layer. You will get the new layer with the beautiful part of the image.
Step 5: Flip the image.
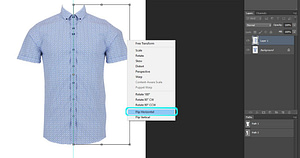
Selecting the new layer with the beautiful part of the image, pressCTRL/COMD+T. The click the right button of the mouse and select flip horizontal from the menu.
Step 6: Attach the new part with the main image.
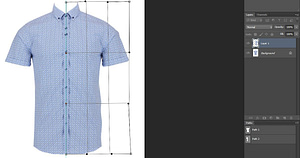
Pressing CTRL/COMD+T, attach the new part with the main image. Then use the retouching technique to adjust the new part with the main image perfectly and naturally. In this case, the worst part must remove from the image. After completing the process, you will get the symmetrical balance of you clothing image.
02. By drawing strokeand using liquify tool
Using liquify tool by drawing stroke is the professional way to symmetric balance in photoshop. You can apply this technique in any types of textures, printed or stripe image. This whole process is known as Symmetrical ghost mannequin. Let’s see the how the process work by the step-by-step guideline.
Step 1 to Step 3:
The step number 1 to 3 are the same for this part also. So, we will not discuss these 3 steps here again. Please follow those steps from the above discussion.
Step 4: Create a transparent/blank layer:
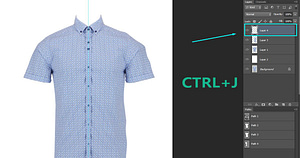
After completing above 3 steps create a transparent/blank layer, please go to the edit option on the above of the photoshop interface. You will fide the stroke option in the dropdown menu. Select it after selecting the path.
Step 5: Select the stroke color and pixel

When you select the Stroke option you will see a new menu box in the photoshop. From the menu box select the stroke color and pixel as your desire and press ok button.
Step 6: Flip the Stroke
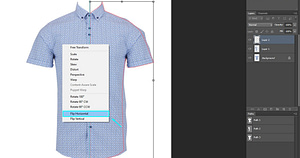
You need to flip the stroke horizontally. For this Select the transparent/blank layer and press CTRL/COMD+T. Then click right button of mouse and flip it horizontally. After that, you will see that the image doesn’t cover the stroke area.
Step 7: Use Liquify tool for fill up the stroke area
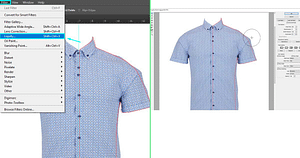
This step is very crucial in the process. As much you perfect to use the liquify tool, you will get the better result. Go to the filter option and select the liquify option form the dropdown menu. Short cut button is CTRL/COMND+SHIFT+X. Then fill up the empty part using this tool.
Final Step:
In final step, you should check the other imperfections such as wrinkle on clothing, any unnecessary spot, edge are ok or not etc. Then save the image as your requirement.
Deference between symmetrical balance and asymmetrical clothing
Symmetrical balance shows both parts of the image visually equal. For example, if a clothing photo having pocket in left side, the right side should have a same pocket. In the same way, sleeve, neck, shoulder etc. must be same in both parts.
On the other hand, Asymmetrical balance in clothing image show one part of image from a particular angel. The highlighted part shows the images details clearly so that the viewer can get the detail idea about the clothing photos.
Deference between symmetrical balance of clothing and mirror effect of clothing image
Briefly, you may thing symmetrical balance and mirror effect are the same thing. But there has a great deference between them. Both techniques show both parts equal in shape, size and the color. The main deference: mirror effect is the shortcut way to do balance in both side of photo and the symmetrical technique is the manual & professional way to do balance symmetrically in the both side of clothing. In a word Symmetrical is the vast this and mirror effect is short way compared to it.
Finishing word
In this blog, we tried to describe all the process of symmetrical balance of clothing photography. We tried to give the details idea to the reader in the easiest way. After all, it is not an easy task at all. So, if you want to hire someone for doing symmetrical balance of your clothing photos, we (Editpictureonline) are available for 24/7. We have a great team who do their best job for the customers. Our price is very competitive, but we provide high quality work.

