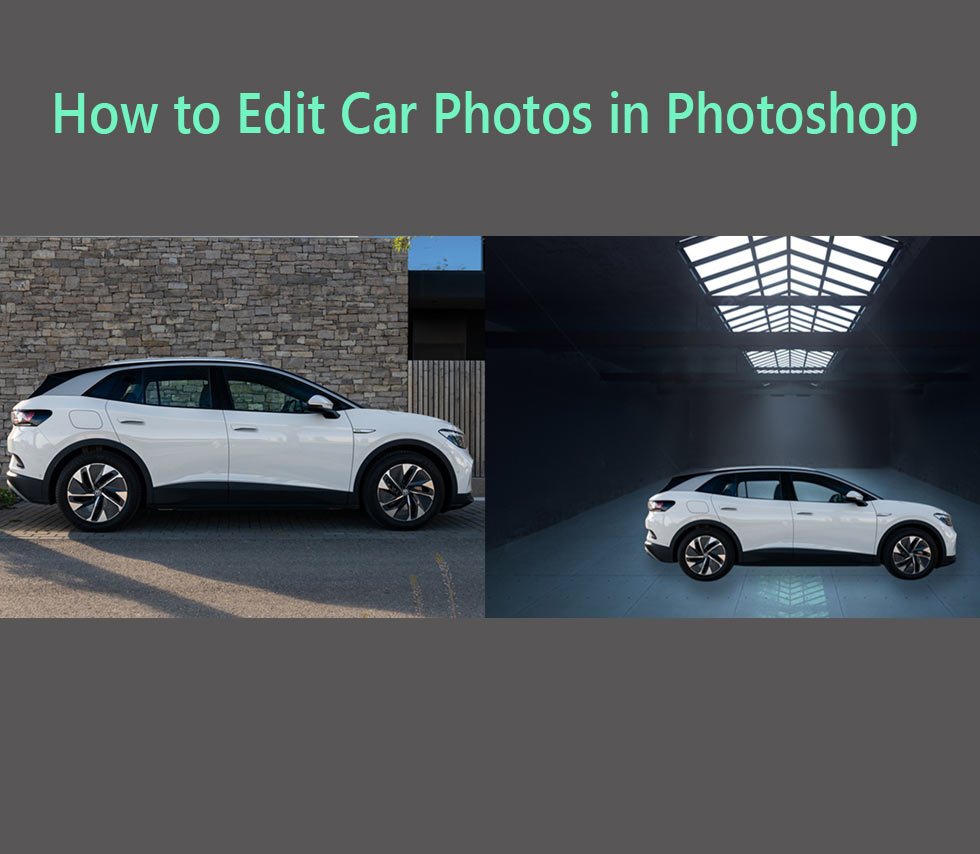
How to Edit Car Photos in Photoshop
Are you a car photographer or car dealer but don’t know how to edit car photos in Photoshop? This article is specially for you. So, You will learn the process of editing or modification from this article. Car photo editing enhances the photo of the car in such a way that generates more sales. Also, if you are a Car or Automobile Photographer or dealer, automotive photo editing is very important, too. It makes car photos look better and more accurate. Without editing, photos may not show the true beauty and details of the vehicle as well. In the raw car photos, there may be many types of problems. So, the colors of the car’s paint and interior may not look accurate in the photo. There can also be small flaws or imperfections on the car that detract from its overall appearance.
This is where car photography editing comes in. Photo editing software like Photoshop allows editors to fix these issues and make the car photos look their absolute best. This article will describe a to Z of Car photo editing service in Photoshop. So, let’s dive into it.
Table of Contents
ToggleTo Enhance a Car Photo in Photoshop, Which Services are Needed?
Car photography is a specialized field that requires a skilled eye and a mastery of advanced photo editing techniques. Perfectly following these techniques, photographers and editors overcome various challenges in photo editing and provide the best car photos. So, if they want to enhance a car photo in Photoshop, various types of services are needed. Like Background removal, Background Replacement, Car photo retouching, and Shadow creation these services are some of the many services. Below, we will describe those processes widely. So, follow those processes and get your desired car images.
In terms of how to edit car photos in Photoshop Background remove and background replacement of car photos are almost similar process. After background removal with transparent background of a car photo, you can add a new background as you want. So, in the bellow we will describe two processes: background replacement and retouching step by step in the easiest way.
Background Replacement for Car Photos in Photoshop
We are going to show the process of Background replacement of a car photo here. In this article, we will do remove the background of a car image, and then we will replace a new background. After finishing the process, you will see an amazing car photo and you will learn how to edit car photos in Photoshop. Also, it really enhances the beauty of car photos and drives the sales.
Step 1
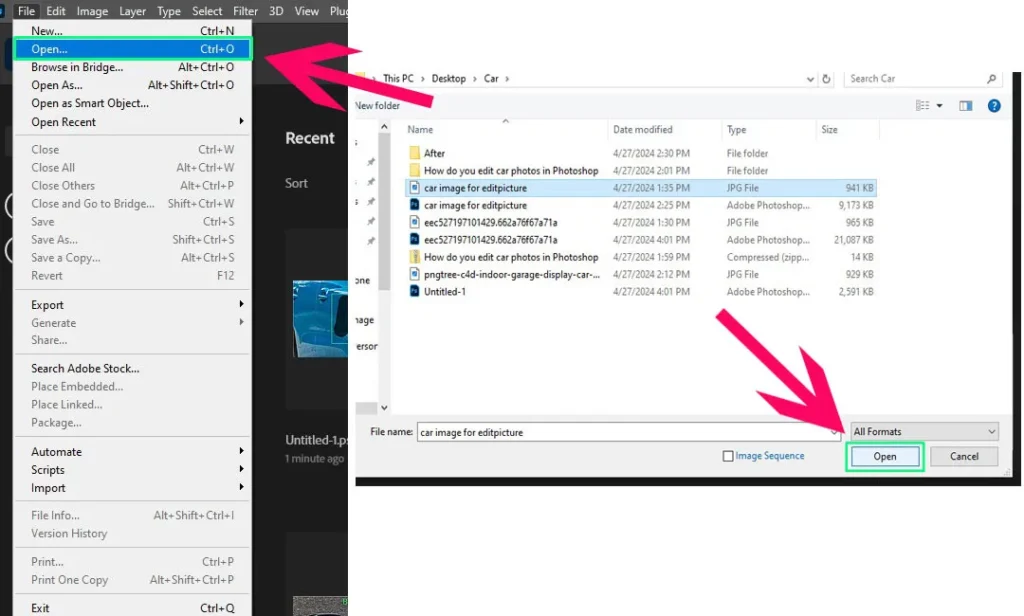
Open an Image in Photoshop: Go to the file option from the top-left side of the Photoshop interface. Select a car image and open it.
Step 2
Duplicate the layer: For Windows, press Ctrl+J, and for Mac, press comd+J to create a new layer.

Step 3
Select the pen tool. We will remove the background of the image using the pen tool because it is the professional way for background removal.
Pro tips: Other tools can be used to remove the background, such as the eraser tool, lasso tool, background eraser tool, and Magic Background eraser tool. All these tools are used to remove the background, but the master one is the clipping path with the pen tool.

Step 4
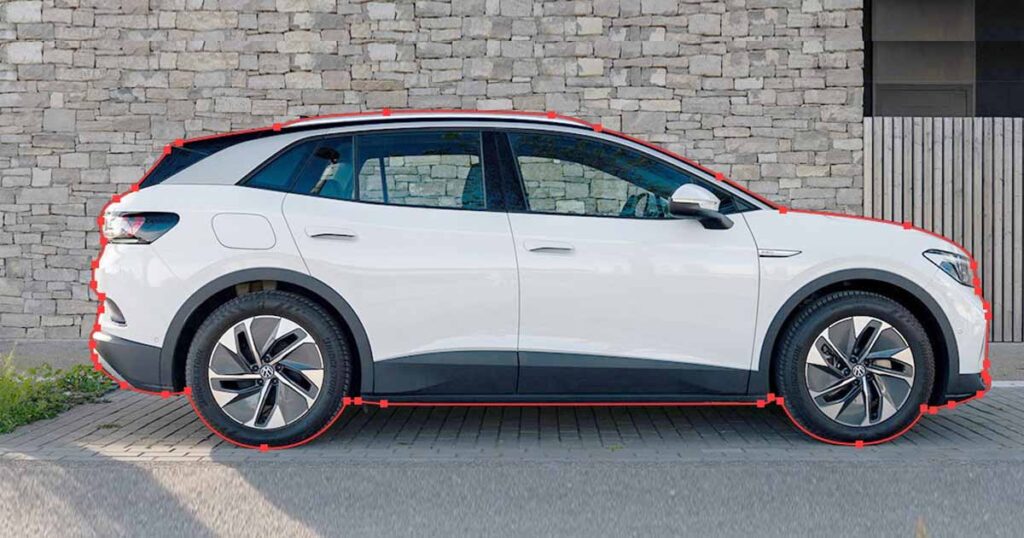
Clipping Car: In car photo editing in photoshop, Car clipping isn’t a tough job. When you draw out a line path around the car, please keep in mind that you must avoid unnecessary anchor points as much as you can. Avoiding unnecessary anchor point give you the real view of the focusing objects.
Pro tips: There are two types of anchor points: hard anchor points and soft anchor points. If you press ALT while creating anchor points it is called hard anchor points. You can create soft anchor points without pressing ALT.
Step 5
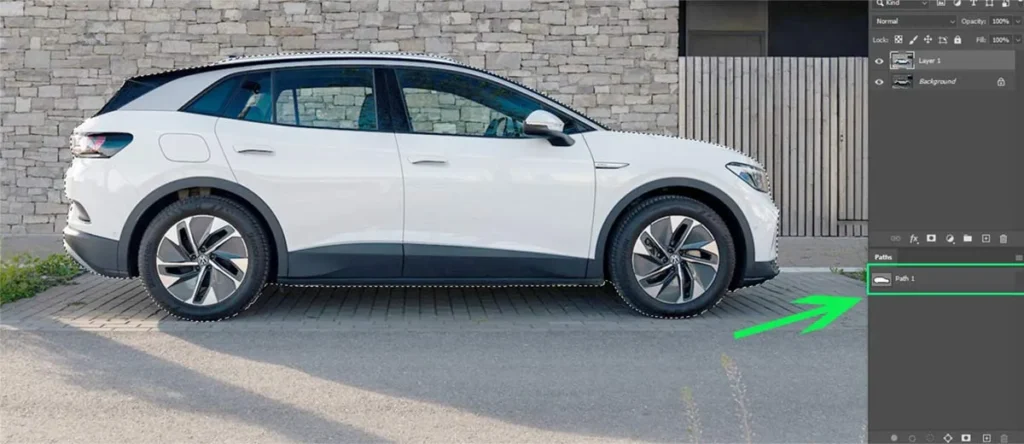
Select the path: After completing clipping path, please select the path. So, you will get the path dialog box in the layer panel. Also, if you do not find it behind the layer panel, go to the window option of Photoshop interface. Click on it the in the bellow you will find the path option. Please click on it.
Step 6
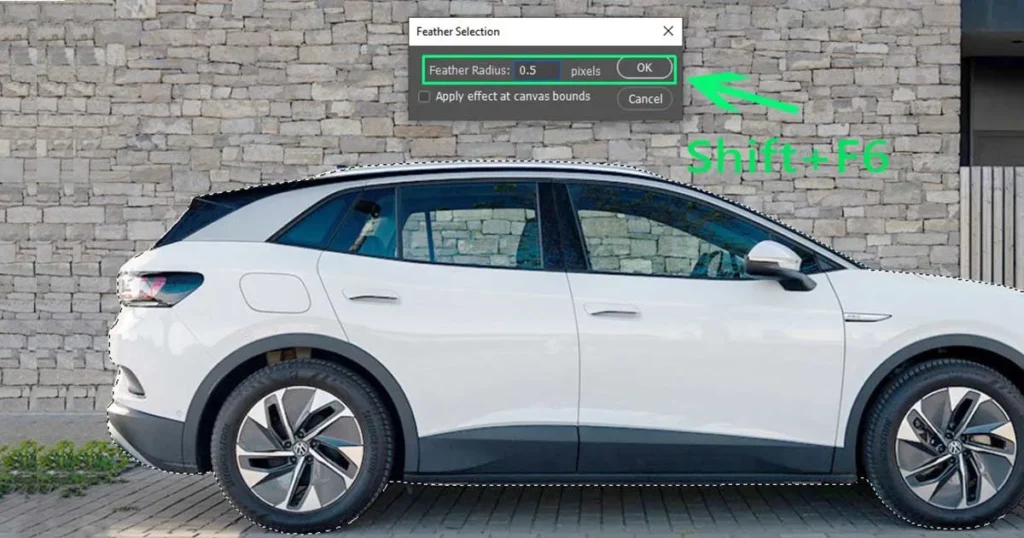
Select the feather: Go to the select option then select the modify option you will get the feather. For shortcut press Shift+F6. Keep radius 0.5 for good resolution.
Step 7
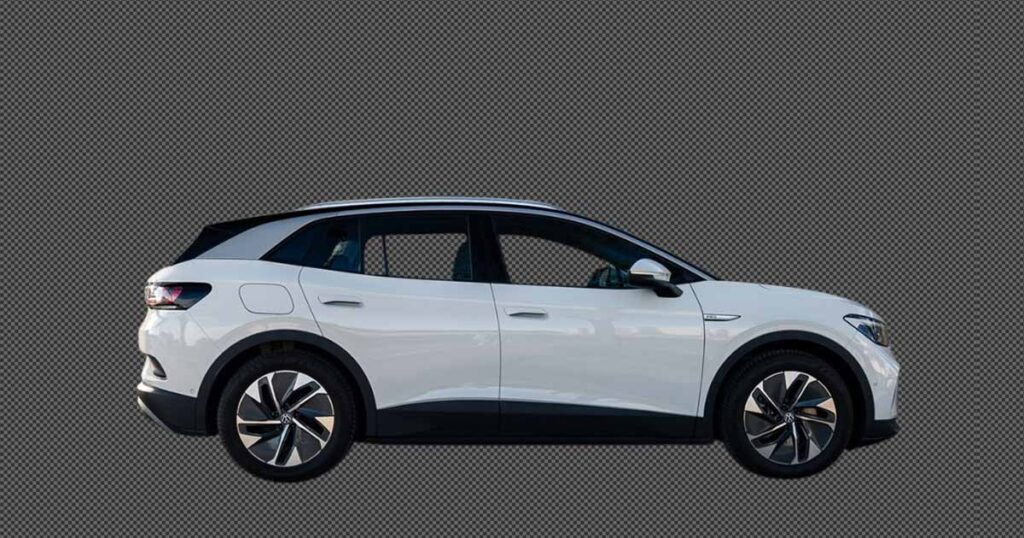
Delete the Background: Press Ctrl+shift+I to inverse the path and press the delete button you will get the transparent background image.
Step 8
Replace the background: To replace the background, open the best car background image in Photoshop.
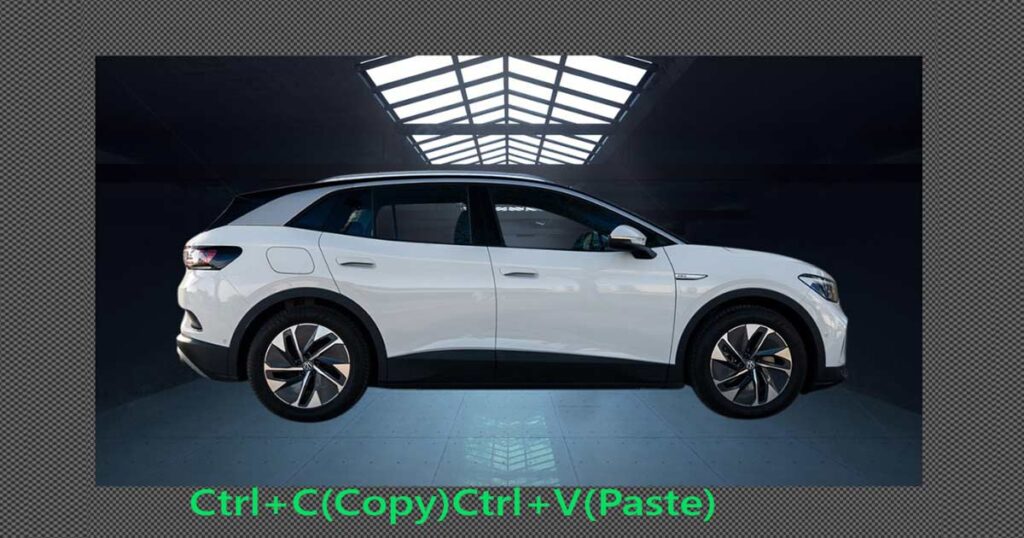
Using the rectangle marquee tool, select the image and paste it on the car image.

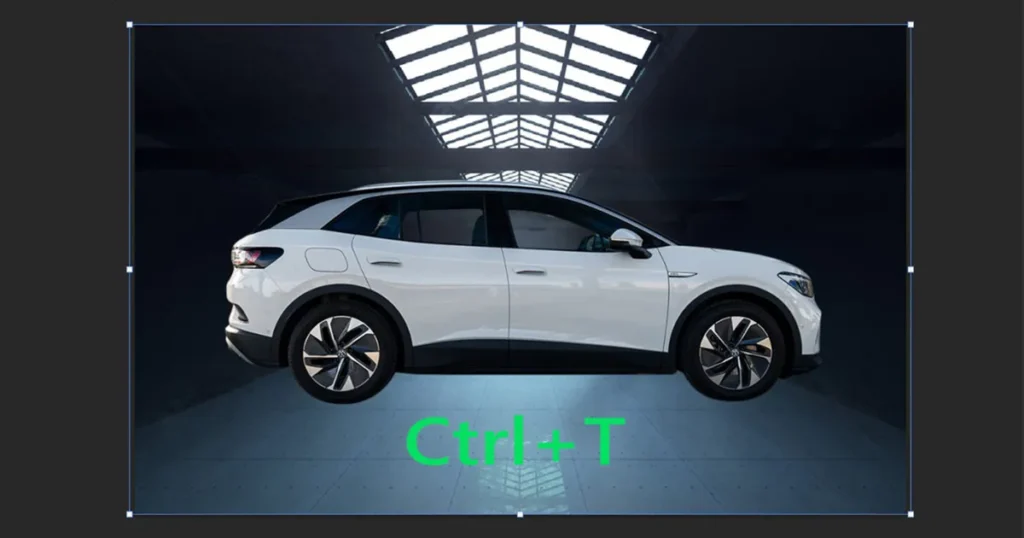
After that, select the layer of the background image, press CTRL+T, and extend the background image as much as you want.
Car Photos Retouching in Photoshop
Car photo retouching service is another most popular service for the car photographers and car dealers. When you retouch up car photo, there may need to use different types of Photoshop tools. For example, Healing Brush Tool, Spot Healing Brush Tool, Patch Tool and Clone Stamp Tool are the popular tools of photo editing. All the tools are not perfect for retouching a car photo. So, you should have known use of the tools. If you are a beginner in Photoshop, don’t worry. We will try to show the process of car photo retouching in the easiest way. Please keep reading this article.
In the bellow, we are going to show you uses of all the above-mentioned tools.
As we show you how to open image in Photoshop and create duplicate layer before, we will not discuss about those steps here. So, let start and enjoy the task.
Car Photos Spot Healing Brush Tool in Photoshop

Step 1
Go to the toolbox and select the Spot Healing Brush Tool as mentioned in the picture. Basically, this tool is used for removing line or scares. So now you can increase or reduce the tool radius as per line or scares size.
Step 2
Keeping press the left button of mouse, draw a line over the scarce. You can see that the line or scares has gone.

Pro tips: While draw the line with this tool, please reduce the opacity and follow. Then you will get the perfect result.
Car Photos Healing Brush Tool in Photoshop

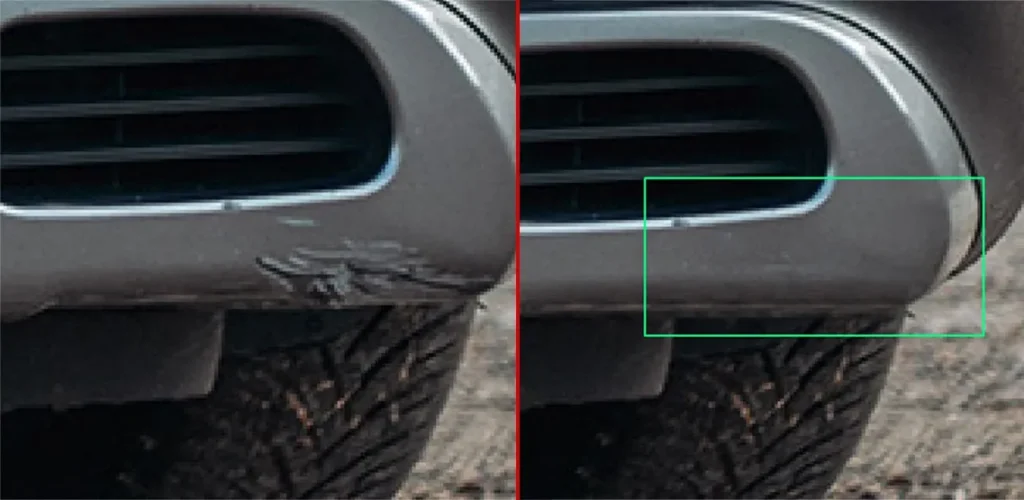
This tool is a little different form the spot healing brush tool. Also, you can remove the spot, scratch or damage part of car photo using this photoshop tool. Let see how it work!
Step 1
Go to the toolbox and select the Healing Brush Tool. Then Press Alt and click the mouse pointer which part you need.
Step 2
Then click over the spot, scratch or damage part of image. For better result follow and opacity should adjust as per image needs.
Clone Stamp Tool
It is very similar to the Healing Brush Tool. The difference between these two tools is very less. Also, the work process and use of these tools almost same. So, we are not discussing this tool in this article.
Patch Tool
In can editing service Patch tool is very familiar. We will describe the use of this tool step by step below.

Step 1
Select the Patch Tool from the toolbox. Then draw a out line around the damage part.
Step 2
Pressing the left button of the mouse put it the on to the good part of the image. So, you will see that the damage part has gone.
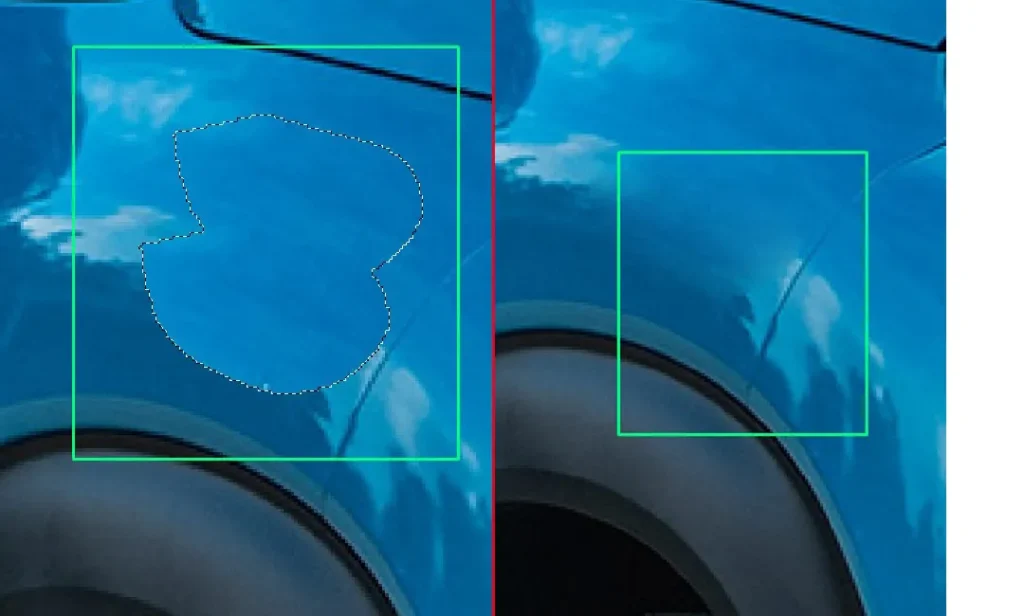
Pro tips: If you select the damage area in a bigger, please use feather 0.5. It will help to retouch damage area smoother.
Best Car Photo Editing Practices
In our article, we have try to show all the car photo editing practices. So now we think now you have a complete idea about how to edit car photos in Photoshop. Also, remember no tools are prefect for professional car photo editing. Also, if you know the use of all the tools professionally, you will be able to edit car photos completely. The tools are perfect for removing spot, but it may not be perfect for removing reflection.
Are you disappointed to know this? Don’t be worried! EditPictureOnline is here! We do professional car image editing services at a minimal cost without considering the quality of work.

