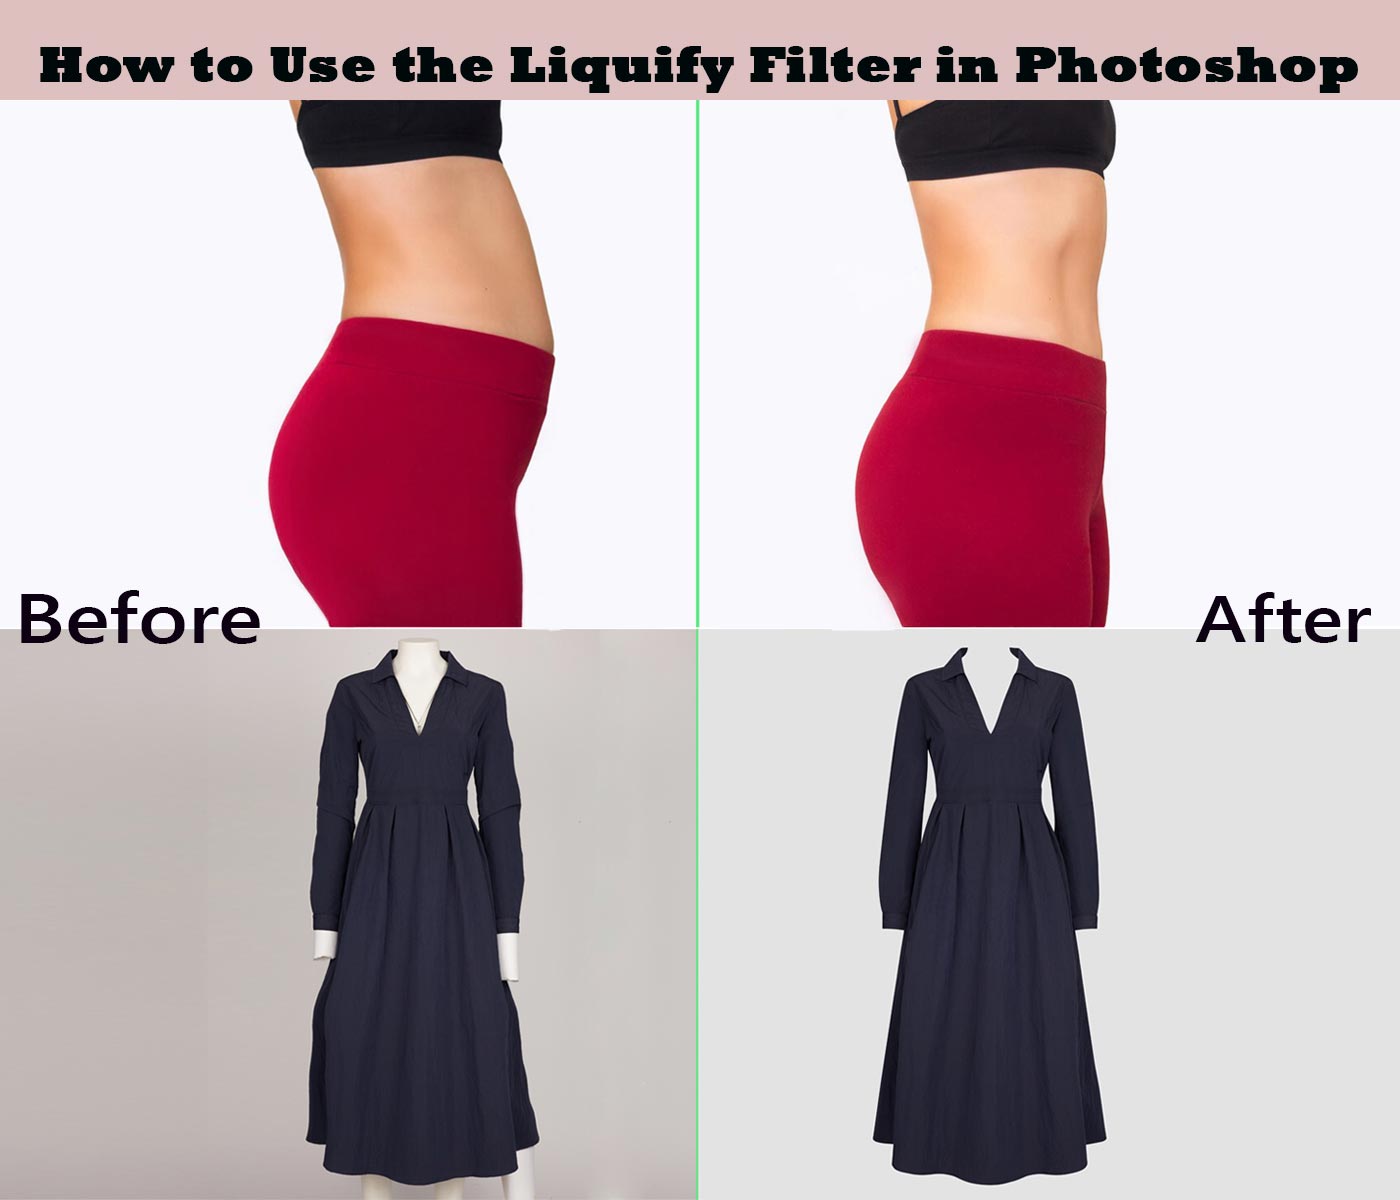
How to Use the Liquify Filter in Photoshop
Adobe Photoshop is a highly effective tool for photo editing, and also one of its own very most flexible features is the Liquify filter. This filter enables you to adjust photos as if they were constructed from liquid, enabling you to restore, warp, as well as change numerous factors within your photos. Whether you’re an expert digital photographer, a visual expert, or even merely an individual that loves to modify photos, comprehending the Liquify filter can easily take your photograph modifying skills to the upcoming amount.
What is Liquify in Photoshop?
The Liquify filter in Photoshop is in fact a highly effective tool that makes it possible for clients to contort and steer graphics in a liquid, all natural ways. Also, It delivers a set of brushes for retouch up that can easily push, draw, spin, mirror, tighten, and bloat any kind of location of a graphic. This filter is specifically practical for creating subtle adjustments to photos, like refining facial functions, readjusting body conditions, or even creating unique, imaginative impacts.
Some essential components of the Liquify filter feature:
- An assortment of brush tools for various results
- The capacity to ice up locations you do not intend to tweak
- Face-aware liquify for portraiture retouching
- Alternatives to watch the initial graphic while modifying
- The potential to develop customized net designs for exact changes
The Liquify filter is actually non-destructive, implying you can easily regularly change to your initial photo if you’re not pleased along with the improvements. This produces it an extremely versatile and risk-free resource for testing and also tweak your images.
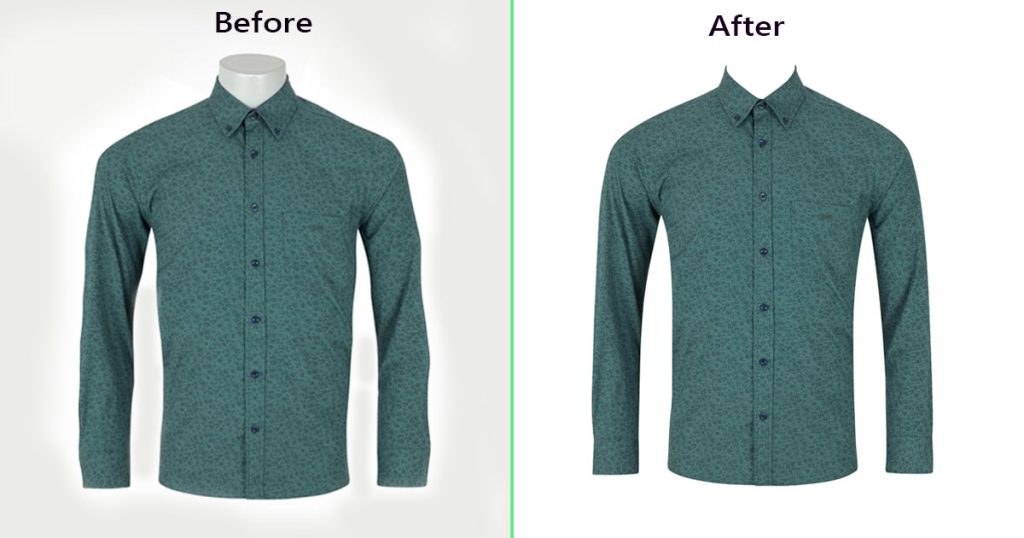
How do you Liquify a Dress in Photoshop?
One usual use of the Liquify filter is actually to change apparel in photos. Whether you’re making an effort to correct an ill-fitting garment or generate an even more complementary silhouette, the Liquify filter can help. Listed here are actually 2 usual cases where you could use Liquify on an outfit:
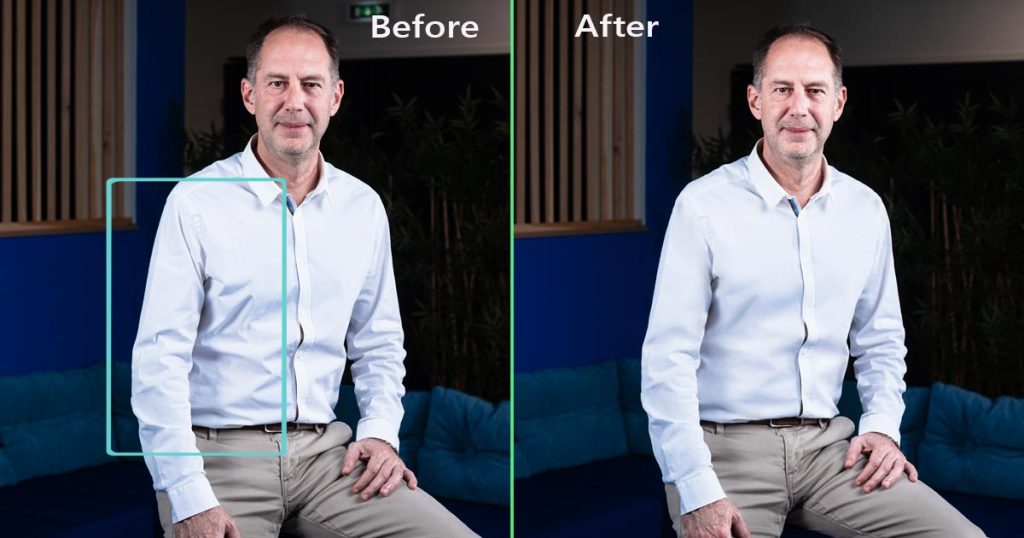
Symmetrical Balance Clothing
In some cases, a dress might look unequal or unbalanced in a photograph as a result of to the present of the design or the means the material drops. Listed bellow’s just how you may use Liquify to symmetrical balance clothing:
- Open your picture in Photoshop and replicate the coating (Ctrl/Cmd + J).
- Head to Filter > Liquify (Shift + Ctrl/Cmd + X).
- Use the Forward Warp resource (W) with a large, smooth comb.
- Delicately push or even draw the upper hands of the outfit to produce an extra symmetrical shape.
- Use the Freeze Mask tool (F) to secure areas you don’t intend to change.
- Readjust the comb dimension and also pressure as needed to have for more accurate management.
- Use the Show Backdrop alternative to compare your changes along with the original graphic.
Don’t forget to create understated corrections. The goal is actually to boost the organic form of the outfit, certainly not to create an outlandish shape.
Wrinkles Remove
The Liquify filter can easily likewise be actually utilized to refine out wrinkles in clothes:
- Open up the Liquify filter as described over.
- Select the Smooth tool (E).
- Change the comb size to somewhat bigger than the furrows you wish to eliminate.
- Carefully brush over the wrinkled areas, using short strokes.
- For stubborn furrows, you can easily utilize the Forward Warp resource to carefully press the cloth in the instructions it need to normally drop.
- Use the Reconstruct resource (R) if you by accident over-smooth a region.
Make sure not to over-smooth, as some organic wrinkles include realism to the graphic. The objective is actually to minimize disruptive wrinkles while keeping the natural appearance of the cloth.
How to Reduce Body Fat in Photoshop using Liquify Filter?
While it’s crucial to reduce body fat positivity and sensible beauty criteria, there may be actually opportunities when subtle modifications are asked for or even necessary. The Liquify photoshop may be used for delicate physical body contouring. Below are actually 2 popular uses:
Reshape Face
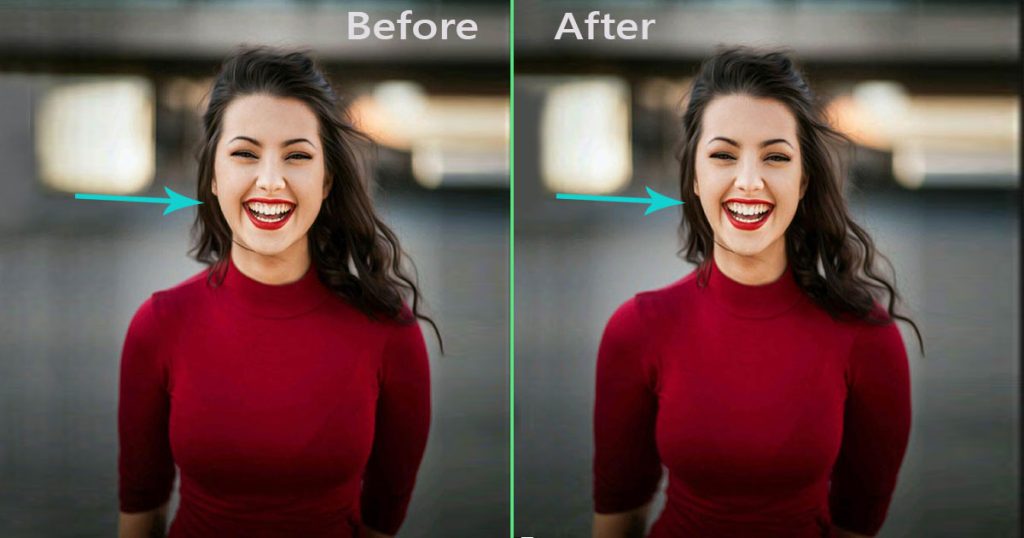
For face reshaping:
- Open up the Liquify filter and also enable the Face-Aware Liquify choice if readily available.
- Then, use the Forward Warp tool along with a little brush size for exact control.
- Delicately press in the cheeks to generate additional described cheekbones.
- Use the Pucker tool (S) around the jaw region to generate a more defined jawline.
- The Bloat tool (B) may be used to discreetly plump mouths or even ravel under-eye locations.
Remember, the secret is actually distinction. Make small adjustments and also often check your work against the authentic photo.
Slim Body
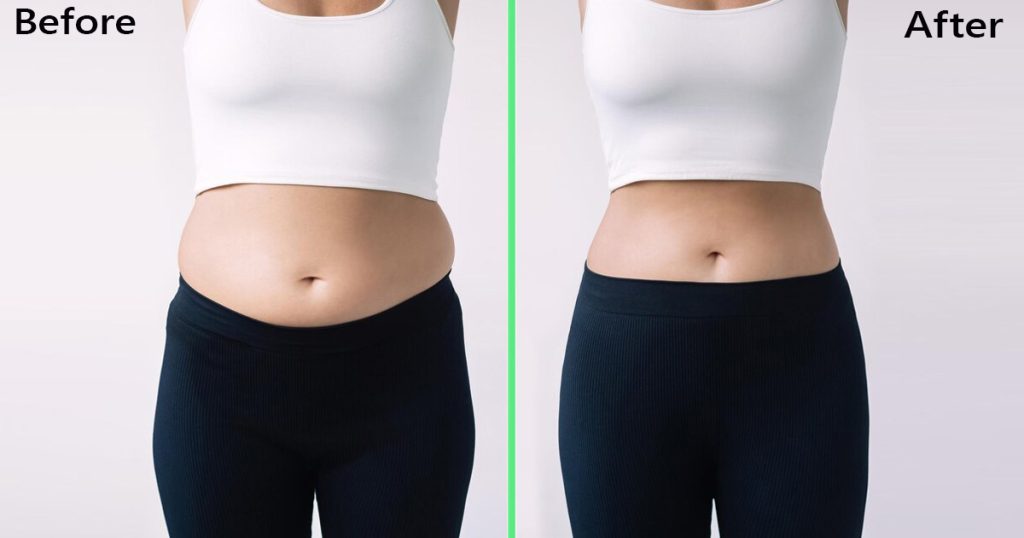
For body slimming:
- Use the Forward Warp tool with a big, delicate comb.
- Gently push in areas you desire to slim, like the waist or upper legs.
- Afterwards, utilize the Freeze Mask information to secure locations you perform not prefer to modify.
- The Hassle-free device may aid mixture your adjustments seamlessly with the remainder of the graphic.
-
The Hassle-free gadget might help mix your modifications flawlessly with the rest of the visuals.
Take advantage of the Reconstruct device to relatively switch over renovations if required.
How do you Quickly Liquify filter in Photoshop?
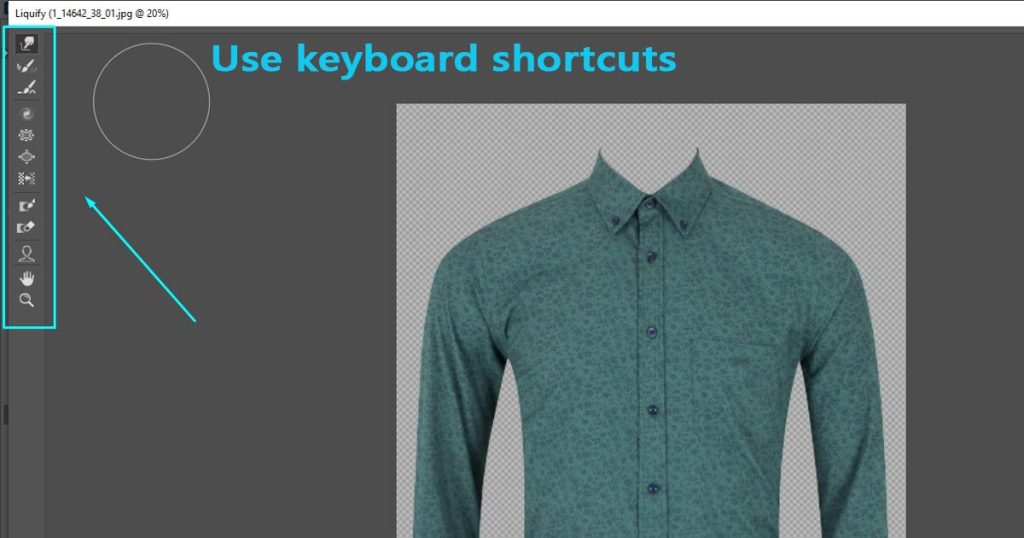
To utilize the Liquify filter effectively:
Usage key-board faster ways:
- W (Forward Warp tool).
- F (Freeze Mask tool).
- T (Thaw Face mask tool).
- E (Smooth tool).
- B (Bloat tool).
- O (Push Left tool).
Adjust brush size quickly:
- Use [to decrease brush size.
- Use] to increase brush size.
- Use the Face-Aware Liquify feature for portraits. It automatically detects facial features, allowing for quicker adjustments.
- Create and save mesh patterns for repetitive tasks.
- Then, use the “Show Backdrop” option to quickly compare your edits with the original image.
- Method routinely to create muscular tissue memory and build an eye for subtle, helpful changes.
Keep in mind, while velocity is very important, reliability and also distinction are actually critical when using the Liquify filter. Put in the time to make exact adjustments for the finest end results.
Benefits of using Liquify Filter
The Liquify filter supplies many perks for photo modifying:
- Non-destructive editing: Changes produced along with Liquify can easily be actually changed or reversed at any moment.
- Adaptability: It may be used for several purposes, from subtle retouching to remarkable artistic results.
-
Precision: The various devices and brush choices enable very accurate management over your edits.
- Face-Aware innovation: This feature creates portrait retouching much faster as well as even more intuitive.
-
Artistic freedom: Liquify permits special misinterpretations and also bending over effects that might be made use of in creative and artistic means.
- Time-saving: For professionals that consistently retouch pictures, understanding Liquify can considerably accelerate their process.
-
Wise modifications: When used knowledgeably, Liquify might create changes that look all-natural in addition to undetectable.
Why can’t I use Liquify filter in Photoshop?
If you’re unable to take advantage of the Liquify filter in Photoshop, there may be in fact an amount of main reasons:
Image Mode: The Liquify filter just companies RGB in addition to Grayscale images..
Little Depth: Liquify work with 8-bit and also 16-bit images. If you’re partnering with a 32-bit graphic, you’ll need to change it to 16-bit or 8-bit initially.
Layer Type: The Liquify filter does not function on correction coatings or even text message levels. Additionally, are sure you’re making an effort to apply it to a pixel-based level.
Not Nearly Enough RAM: The Liquify filter calls for a significant quantity of moment. Therefore, if your unit is short on RAM, Photoshop might certainly not manage to open up the filter
Outdated Software: If you’re using an older version of Photoshop, you might not have access to the latest Liquify features.
Corrupted Preferences: Sometimes, Photoshop’s preferences can become corrupted. So, try resetting your preferences to see if this solves the issue.
File Format: Some file formats may not support the Liquify filter. Try saving your image as a PSD or TIFF file and then applying the filter.
If you’ve checked all these potential issues and still can’t use the Liquify filter, it might be worth reinstalling Photoshop or contacting Adobe support for further assistance.
Last Words
In conclusion, the Liquify filter is a powerful tool in Photoshop that offers a wide range of possibilities for image manipulation. Also, from subtle retouching to dramatic distortions, it provides photographers and designers with the ability to reshape and refine their images in unique ways. While it’s important to use this tool responsibly and ethically, especially when it comes to altering body shapes or facial features, mastering the Liquify filter can significantly enhance your image editing capabilities. So, with practice and a good eye for detail, you can achieve natural-looking adjustments that enhance your photos without compromising their authenticity.